

Easy Way of Fitting a V2 Radiator
This is worth a read because it might save you a lot of effort if this solution works for you.
We have sold hundreds of V2 radiator boosters and until now we recommended that you:-
1) Remove the existing tail which connects to the Lockshield Angle Valve.
2) Screw the V2 Radiator Booster directly into the radiator.
The V2 ends up 27mm closer to the radiator
On the 6th of January 2023 I was contacted by Rex, a customer who found he had very little play in the pipes. The 27mm mis-alignment was just too much to achieve. To make things worse he was not a plumber, he did not have an adjustable spanner, and he did not have a pipe slice. He asked if with just a normal spanner and no pipe slice he could still fit a V2 Radiator Booster.
This was the photo he sent and I noted that that he had a standard valve as I have throughout my house.
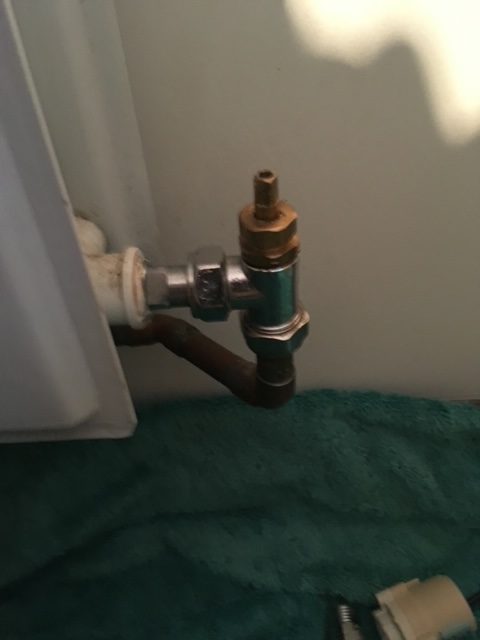
I disappeared into my loft to find a box of R&D fittings and with the aid of a tape measure I confirmed that provided you have a standard lock shield valve which is already in place you have a 27mm mis-match. Removing the olive allows you to use the flexibility within the radiator tail and reduce this to 3mm.
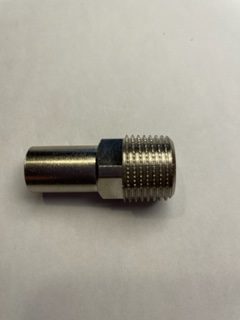
Instead of cutting off the olive I bought a new radiator tail from my local plumbers’ merchant for £1.50 (see below):-
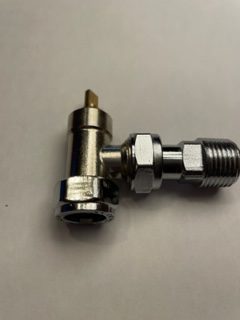
When the original Angle Valve was fitted to your radiator the tail is pushed in to its maximum extent (see below):-
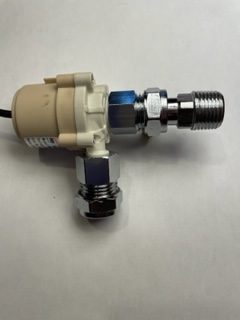
Replace the original tail with the new tail you just bought and fit the V2 radiator flow booster directly onto the new radiator tail. It should fit as the dimension from the radiator to the centre line of the V2 is just 3mm greater than it was for the angle valve and you can make it identical if you just reduce the length of the spigot with a file.
Thank You
Alan Wright – 8th January 2023
Inventor of the ShowerPowerBooster,
Radiator Flow Booster,
and the Solar Tank stratification device.

